Image opacity is the factor that decides how strong or light you want to show your object. For some photographic requirements, you may have to present your object in a different way. In that case, you will have to change the image opacity. Let me show you the process of how to change the opacity in Photoshop.
To follow the step-by-step process given below, you can easily do it without having any special skill in image editing. By following the tutorial, you can both reduce and increase the opacity in Photoshop. Deep Etched Images brings the simplest tutorial for you to change the opacity.
How To Change Opacity in Photoshop?
Step 1: Open The Image To Change Opacity
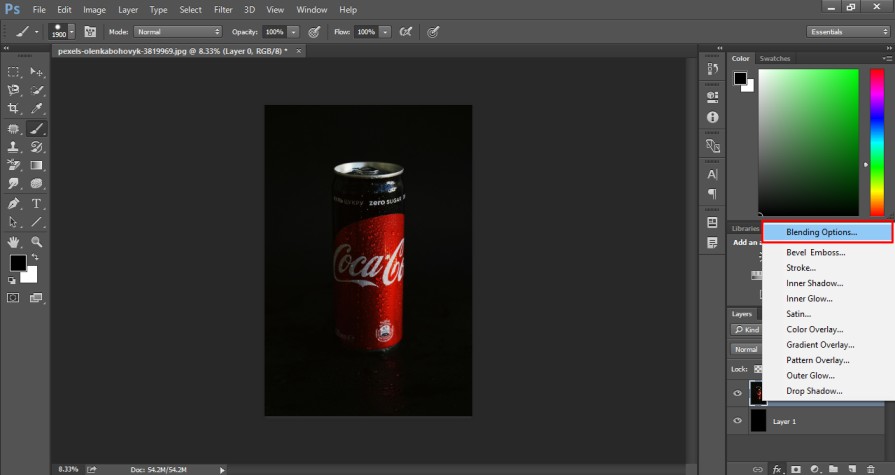
First of all, you need to open the image that you are going to change the opacity in Photoshop. I am going to use the below image for this tutorial.

After opening the image, you will have to create a new black layer. We will need this black layer to decrease the opacity of the image. You can take a layer by using the shortcut Shift + CTRL + N. Then, you need to make it completely black.
Step 2: Choose The blending Option
In this step, you have to click on the FX icon from the layer panel. You can get it from here.

Within this option, you will get the blending option. It will allow you to control the opacity of your image.

The main layer should be placed on the top and the black layer should be placed on the below. Otherwise, it won’t control the opacity.
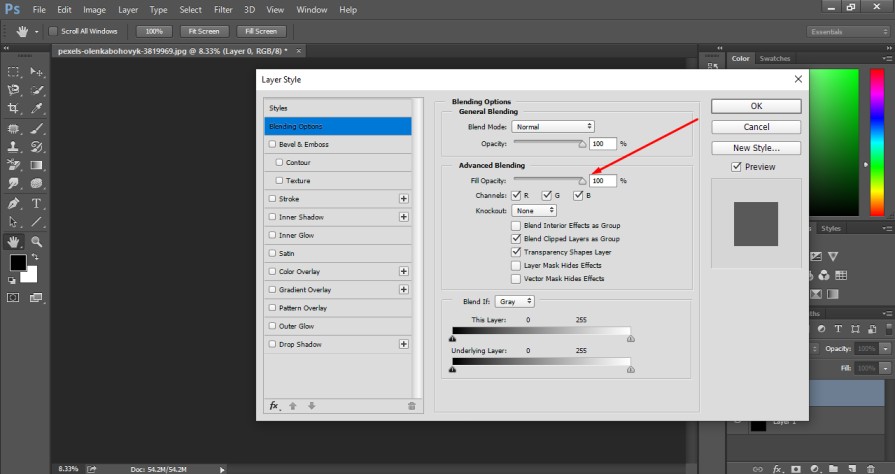
Step 3: Change Opacity From The Blending Option
In this window, you will get general blending and advanced blending options. By using those features, you can control the opacity of the entire image.

If we reduce the blending slider, it will reduce the opacity of the image in Photoshop. Here you can see the example.

Step 4: Confirm The required Opacity
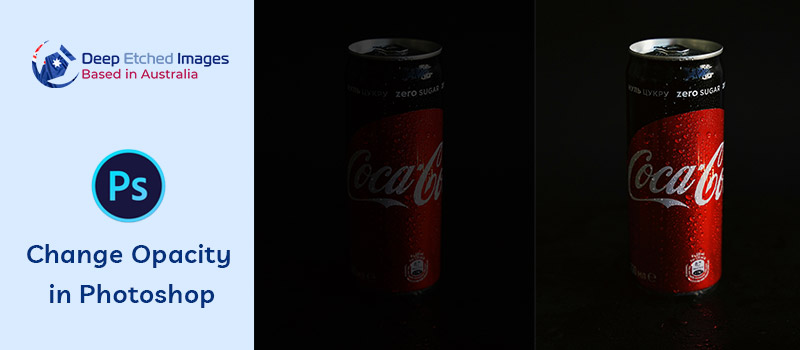
When you get your expected opacity, you can press the enter key to confirm it. Here is the image after changing the opacity.

Finally, you can save your image with the reduced opacity. By following the same method, you can also increase the opacity by moving the blending slider to the right.
3 Tips To Follow to Change Opacity In Photoshop
- Select the layer you want to adjust and use the Opacity Slider at the top right of the Layers panel for precise control.
- With the layer selected, press any number of keys for quick opacity changes in Photoshop.
- If you’re adjusting multiple layers, group them first. This ensures all layers change opacity together.
3 Mistakes To Avoid To Change Opacity in Photoshop
- Don’t use the fill option The Fill option changes only the layer’s content, while Opacity adjusts everything on the layer.
- Lowering opacity too much can make designs hard to see. Use it wisely for balance effects without losing visibility.
- Don’t place the black layer on the top of the background layer. Otherwise, you will get a black image.
Wrap Up
Now, you can easily change the opacity in Photoshop from the blending option. If you want to make a whitish tone after reducing the opacity, you will have to take a white layer. Taking a black layer will make the image black after reducing opacity.
If you are looking for a reliable virtual studio to handle your image editing requirements, you can choose Deep Etched Images to get all the services like an in-house designer. Moreover, it’s 7x more affordable compared to hiring in-house designers. You can have a try now.
FAQ’s
What’s the difference between opacity and fill-in Photoshop?
Opacity changes the transparency of everything on the layer. On the other hand, Fill only adjusts the transparency of the layer’s content.
Can I change opacity for multiple layers at once?
Yes, You can group layers together and then adjust the opacity of the entire group for consistent changes.
Is there a shortcut to change opacity in Photoshop?
You have to select the layer and click on the opacity from the layer panel. After that, you have to press the number key to quickly change the opacity.
Why isn’t my opacity change showing on the image?
You should select the correct layer and ensure that no layer masks or blending modes are enabled with the opacity settings.


