Creating deep etched images is essential for product photographers and online sellers. Photoshop is the best tool for that. AI is becoming popular nowadays for different tasks.
For professional editing, AI doesn’t have a precise quality. Compared to Adobe Photoshop, they have lots of lacking.
For commercial use of images, you must use manual hand-drawn editing methods to be professional.
Otherwise, your image will be the reason for losing customers and trust. Here’s the process of how to create Deep Etched Images in Photoshop.
How to create deep-etched images in Photoshop accurately?
1st Step: Image Opening
2nd Step: Tool Selection
3rd Step: Deep Etching The Product
4th Step: Save Path
Final Step: Save Final File
1st Step: Image Opening
The first process is to open the image in Photoshop. We are going to work on this image.
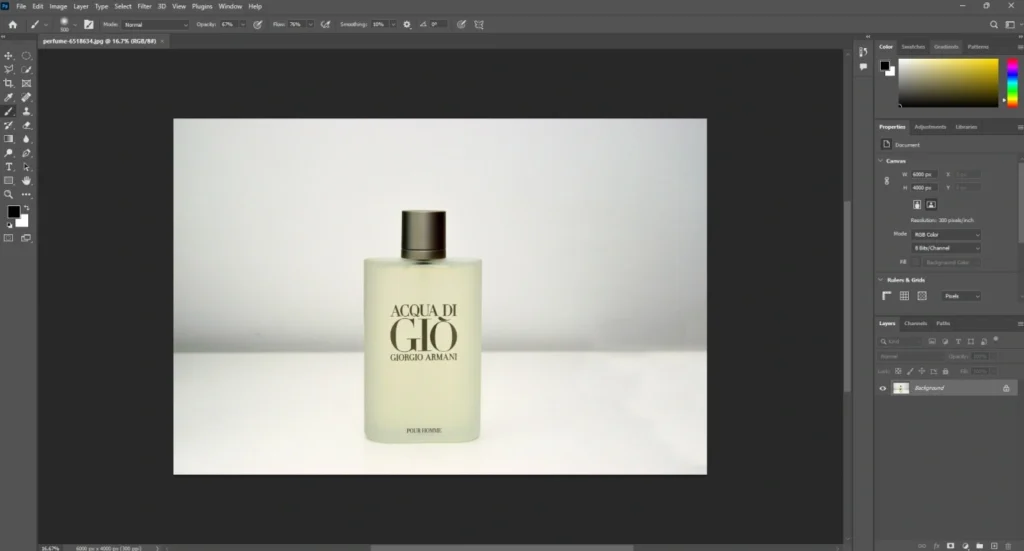
After opening the image, the layer will be locked. After that, we have to click on the background layer to unlock the layer. It will enable transparency and other features for the image.
2nd Step: Tool Selection
In this step, we are going to use the pen tool to create deep etched images in Photoshop. Here’s the option for that.
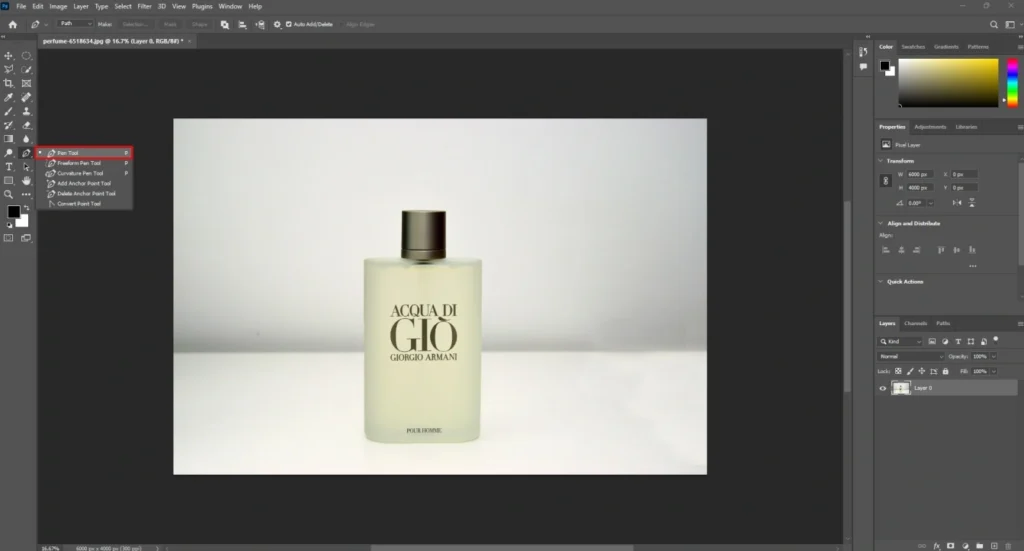
Now, we have to zoom in on the image by pressing CTRL + together. You can use the spacebar to adjust the image position.
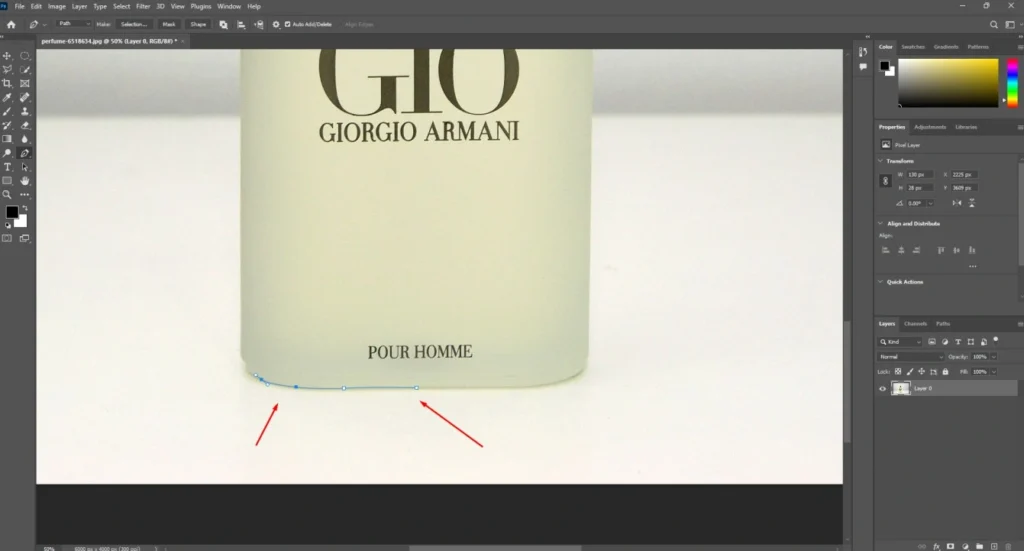
After that, left-click on the edges of the product to create vector lines. This is the path that’s going to separate the object from its original background.
3rd Step: Deep Etching The Product
We need to cover the entire product using the pen tool. This is deep etching. There might be some curves and bending sections within the object. You need to drag the mouse to curve the path. Here’s an example.
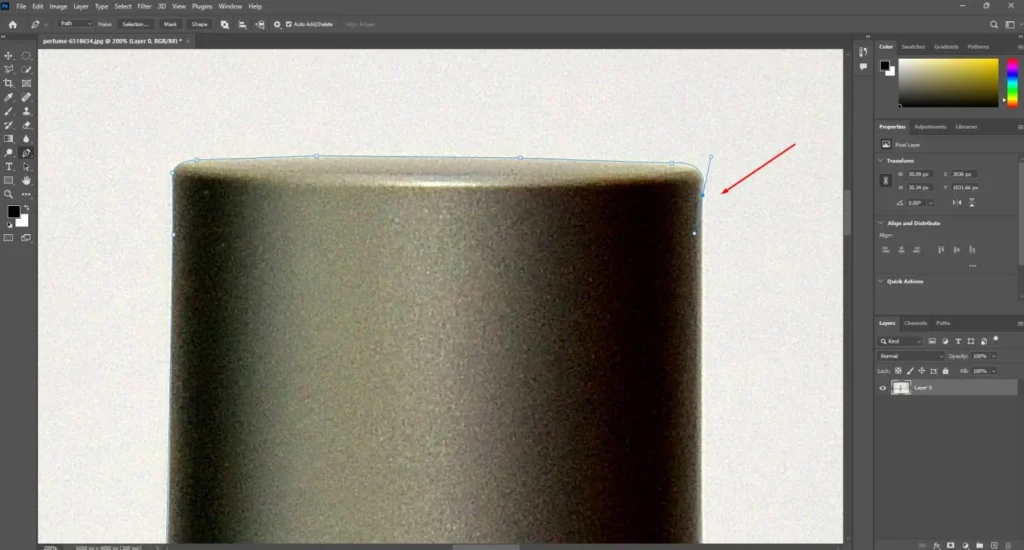
If you want to undo any step, you can do it by pressing CTRL + Z. After covering the entire product with a vector path, you need to join the final anchor point on the starting point.
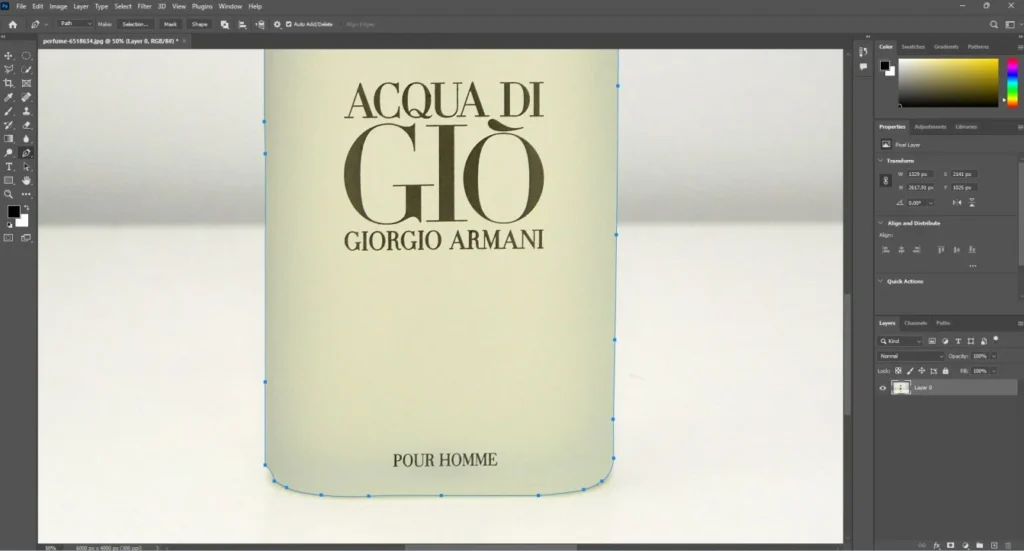
4th Step: Save Path
The path creation is done. To save the path, we have to click on the path section from the layer panel. If there is no path section, you have to bring it from Windows > path.
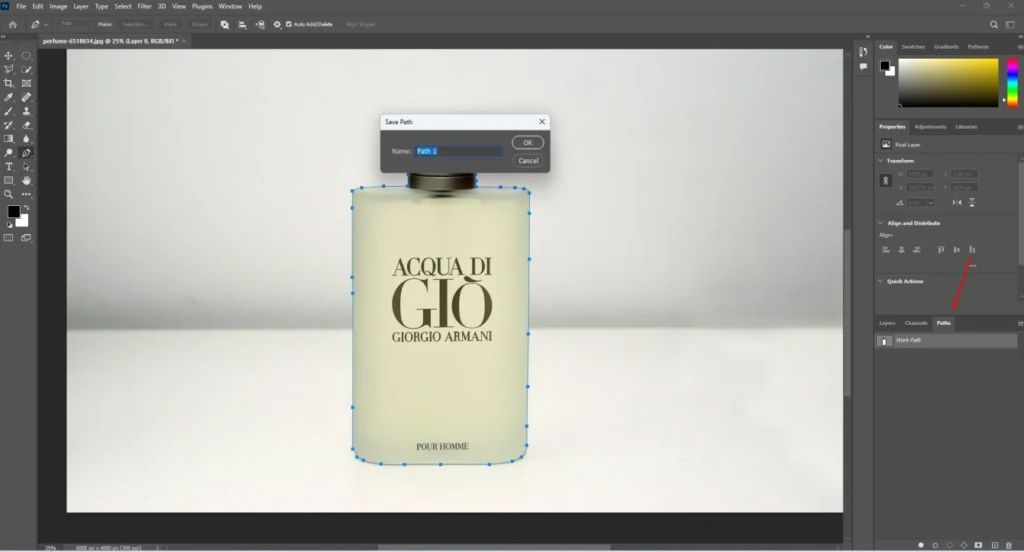
Final Step: Save Final File
To save the image with a path, you have to save the image as JPG. To save the image with a transparent background, you have to remove the background.
Right-click on the product and choose to make a selection from the option. After that, we can get rid of the background by clicking on the mask icon.
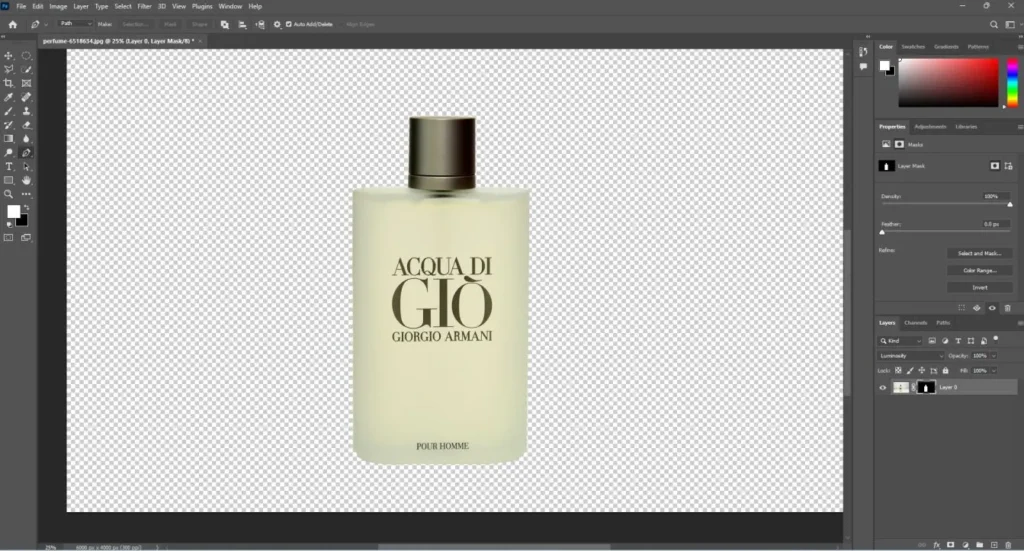
To save the image in any required format, you have to go to this option.
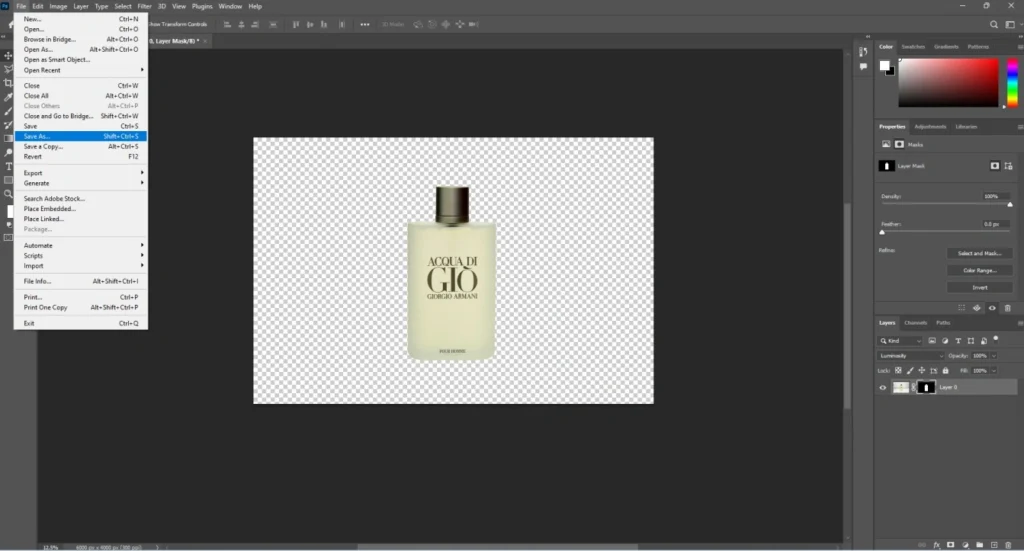
That is the full process of how to create deep-etched images in Photoshop. You have to follow the shown process to do that for your products. Here are some exclusive tips to make the editing even better.
5 Things To Keep In Mind To Create Deep Etched Images
- Make sure that you have unlocked the layer to access all features
- Start creating a path from a flat area for more convenience
- Change the path direction by pressing CTRL and ALT key
- Save as JPG to keep the path with the image after saving
- Save as PNG to get a transparent background for your product
Final Words
Creating deep teched images is the best solution for product photography to get a suitable background. In this process, you won’t have to change the background manually each time while capturing products. Overall, it will save you time and money.
Want to get deep-etched images for your product photography? Our editor’s team will assist you. Contact us now to discuss further about the project. Experience the best way to deal with product photo post-production.
FAQ’s
Is deep etching the same as background removal?
Not both are different. Background removal could be done in many ways. Deep etching involves more accuracy and attention to detail. For tricky edges and complex shapes, deep etching is the proper process to remove the background.
Why should I deep etch my product photos?
Deep etching helps your product stand out by eliminating background distractions. It makes your images look store-ready. It is preferred by Aussie shoppers when buying online.
Can I create deep-etched images using just Photoshop?
With the right tools like the Pen Tool, Photoshop alone gives you full control to create clean, and high-quality images. So, you can create deep-etched images using just Photoshop.
How long does it take to deep etch one image?
It depends on the skill of the editors and the complexity of the image. For simple product photos, it can take around 15 minutes. For super complex objects, it can take more than an hour.
Is deep etching suitable for all types of images?
Deep etching is suitable for product shots, portraits, and objects where you need a sharp separation from the background. So, you can consider it suitable for all types of images.
